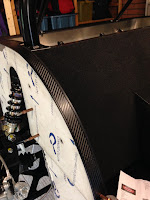
This is a a flimsy piece and one which you have to be careful not to inadvertently damage whilst working on it - it sits in a prominent position and any creases or bends in the metal will be seen.
It needs IVA trim on the inside and outside edges of the strip before riveting into position on the top panel. My wife suggested it would look good with the carbon fibre wrap effect applied to it and in turn I could use black head rivets to fix the shroud to the top of the rear panel (one aspect, visually I wanted to avoid was the sight of rivets - black on black my avoid that...)
So I applied the carbon vinyl wrap to the strip, firstly ensuing it was clean of grease and dirt before applying.
 This was followed by application of the inner and outer beading round the edges which is required for IVA purposes. The inner trim fits nicely and follows the edge well - it needs some glue on the edge of the strip and then the IVA trim is teased into position and pushed onto the inner edge.
The outer IVA strip requires more coaxing round the curves - a combination of tape and washing pegs ensured it temporarily stayed in position whilst I created "nicks" in the trim to help it round the external curves of the shroud.
Once I was happy with that - it was a case of getting the glue out and gluing into position. Apply some masking tape to hold it in place and leave to fully dry for a day or so.
The shroud can now be placed back along the top edge of the rear panel, re-drill through the holes originally drilled when the rear panel was being formed and rivet into position with the black-headed rivets.
 I also carefully bent the long pieces of the shroud down and over the leading edge of passenger/driver cockpit and temporarily Cleco'd into position at the bottom straight edge near where final stainless steel door trim will be applied - hopefully the final rivet used will be hidden nicely when it is all glued into position.


No comments:
Post a Comment