Very quick job on a dark Wednesday evening... earthed the engine to the chassis using the earthing strap which comes with the battery loom kit.
There is a hole already in the chassis plate which I managed to source a nyloc nut and bolt that fitted nicely through - remember to remove some powder coat from around the hole area on the chassis plate to ensure a nice clean earth surface.
the other end screws into a spare hole on the engine block, again I managed to scrounge a bolt which fitted nicely however it did need cutting down to a short size in order to screw into the engine block sufficiently.
Battery power leads are another easy quick fit.
GBS plug and play wiring kits are perfect for wiring a car, their battery power lead kit provides all the leads, fixings needed to get juice from the battery to the electrics in the vehicle.
Two holes need to be drilled through the firewall and they in turn are fitted with rubber grommets which the leads pass through.

The negative lead will earth on the chassis frame behind the dashboard panel whilst the positive is fastened to the fuse board panel via a screw terminal.
A further positive lead runs from the fuse board terminal to the starter motor and then from the starter motor to the alternator. A further engine earthing lead will need fitting when the engine is installed.
Now I have got the rear panel into shape I have decided to focus more attention on the rear of the car and get it to a suitable point in the construction process where I can aim to get the rear panel fixed into position permanently.
that means getting parts such as the fuel tank, rear wiring, etc all fixed in.
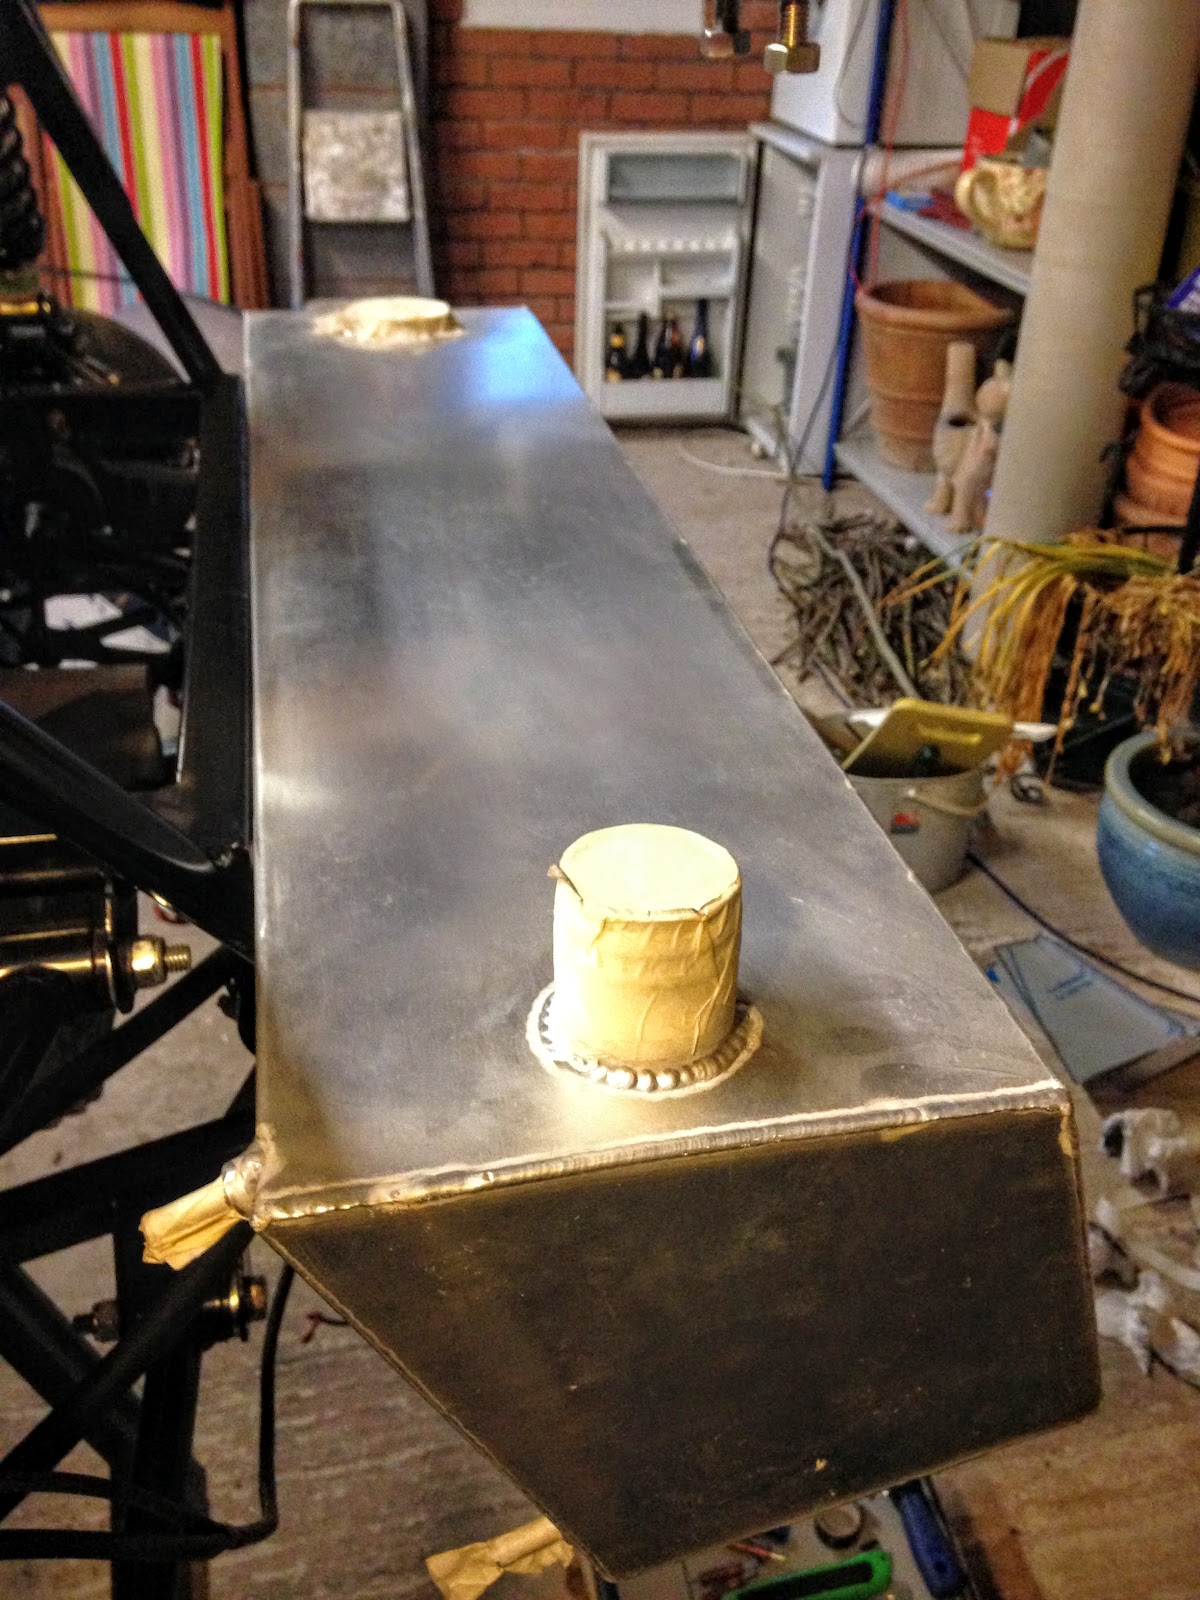
 Fuel tank - simple task - centralise along the rear of the chassis frame, sealant underneath, along the lower rear frame and along the top leading edge
Before I glued the tank into position I took the opportunity to see how the wiring loom will route around the rear of the panel, in particular the fog lamp, reversing light and number plate lamp - its quite tight these will need some gentle coercion into position when the rear panel is finally fixed into place.
The key thing I need to remember is to route the wires through the rear panel as I manoeuvre the rear panel into position rather than try to route wires after the panel is fixed in - my hands are too big to reach!
the following photos show the space where the fuel tank will sit and shows roughly how the rear wiring will route:
A couple of photos of the tank glued into position.
Once the tank had firmly fixed into position, I connected the fuel pipes to the upper and lower parts of the tank - fingers crossed the fuel system is connected up rear to front now with just the final routing to the engine to complete
So.... back to the build and time to look at the harness. Whilst the chassis is still accessible and before the rear back panel goes in I thought it would be wise to get the routing for the main wiring harness resolved and in situ.
This part of the build, well in fact anything electric for that matter is filling me with dread a likely irrational thought since opening the packaging reveals a harness fully labelled, with proper plug and play capability and what seems on the face of it at this stage anyway minimal wiring and soldering required.
Full credit to GBS and I can fully see from looking at this why they are proud of the whole electric configuration on the zero. Each element be it instrument panel, engine bay, speed sensor, battery terminals are additional sub assemblies which merely plug into the main harness - Ideal for someone like me who fears the dark art of automotive electrics!
First thing to do was to temporary fix the firewall into position and then fix the fuse box onto the firewall so I can get a datum for where the wires run - first snag / head-scratch which way does the fuse box go and why four holes in the firewall when only two holes in the fuse box to fix in place?
 Problem solved with a quick enquiry onto the owners club forum - wires come out of the top of the fuse box and two holes in the fire wall are not needed (why they are drilled in the first place...well that's for another day perhaps!). That problem resolved, fuse box fixed into position, time to route the harness through the chassis.
I elected to hang the harness off the brake lines/fuel line run thus keeping all services down the one side of the transmission tunnel - it gets very tight through the transmission area out into the rear and run around the boot bottom framework.
Moving towards the front of the car again hanging off the brake lines,along the passenger side, down the left hand side of the engine bay across the front left and right to the radiator, onto the headlamps area.
Being happy with the general running of the wires I fixed into place with cables ties ensuring spacing of ties complied with IVA rules (I have kept the front temporarily tied into place until I am comfortable with final positioning, I suspect how I have it now will change as attention is turned to the front of the car down the line).
The main harness is earthed to the chassis at the rear, so find a suitable place to rivnut a connection which will allow the earthing terminal to fix into place.
All loose wires were tidied up to prevent damage.
Alas photos don't really do any justice to the routing / final fix as black on black does not come out well