Showing posts with label fuel. Show all posts

Wednesday, 8 November 2017

Fuel Rail modification

Now the cooling circuit has been installed, progress towards the completed engine installation gateway moves ever closer. Need to refocus energies back on fuel circuit.

Previous posts will have made reference to the fuel system, swirl pot etc the final piece to complete is running fuel lines from the HP pump to the fuel rail and from the swirl pot to the fuel regulator at other end of the fuel rail.   

In regards to the fuel regulator, reading the GBS owners forum, it is suggested the OEM Ford regulator is more than adequate for the build and although the GBS fuel system comes with an adjustable fuel pressure regulator it is not essential to replace the OEM one with the adjustable version (need to return that..!)

So basing my decision on better peoples knowledge I elected to keep the Ford regulator.

One piece which does need replacing is what can be best described as the twisty return pipe which comes out of the other end of the fuel rail. Some builders have bent this round and cut off leaving a short piece protruding onto which the fuel hose connects. GBS do sell their own adapter which replaces the OEM part - not being overly expensive and personally I think looks better I switched the OEM part for the GBS version.


Final comment, GBS suggest switching the fuel regulator round with the adapter, however when I did this i noted the regulator blocks a wiring loom plug so decided to leave as per the original layout (regulator facing the front of the car, adapter facing the firewall)

So, build wise its simply a case of removing the "twisty return pipe" and replacing with the GBS adapter!


Wednesday, 22 June 2016

Fuel Sender


Still progressing towards getting as much of the rear panel / end complete as possible, the fuel sender is a nice quick job to pass an hour away.


Reading other blogs it seemed apparent that holes needed to be drilled into the fuel tank aperture where the sender sits, conscious of not wanting any swarf to enter the tank, I expected the first job to be some careful drilling.


PA peasant and welcome surprise, the fuel tank had holes pre-drilled and threaded where the sender sits - well done GBS,  nice "upgrade" on the construction of the fuel tank

So with the holes resolved it was a case of identifying the screws needed to secure - I established they are M5 x 10 and elected for the button head screw more for aesthetics rather than anything else.

Simple job, some thread lock onto each screw and secure the gasket between the fuel tank and sender unit with some gasket seal and tighten all up - job done.

One curious aspect with the wiring loom and the fuel sender wire, the wire has ring terminal connectors rather than spade connectors so they will need replacing to enable final fitment onto the sender - a bit puzzling this considering GBS supply the fuel sender, I would have expected common connections between the wiring and sender....


Thursday, 12 May 2016

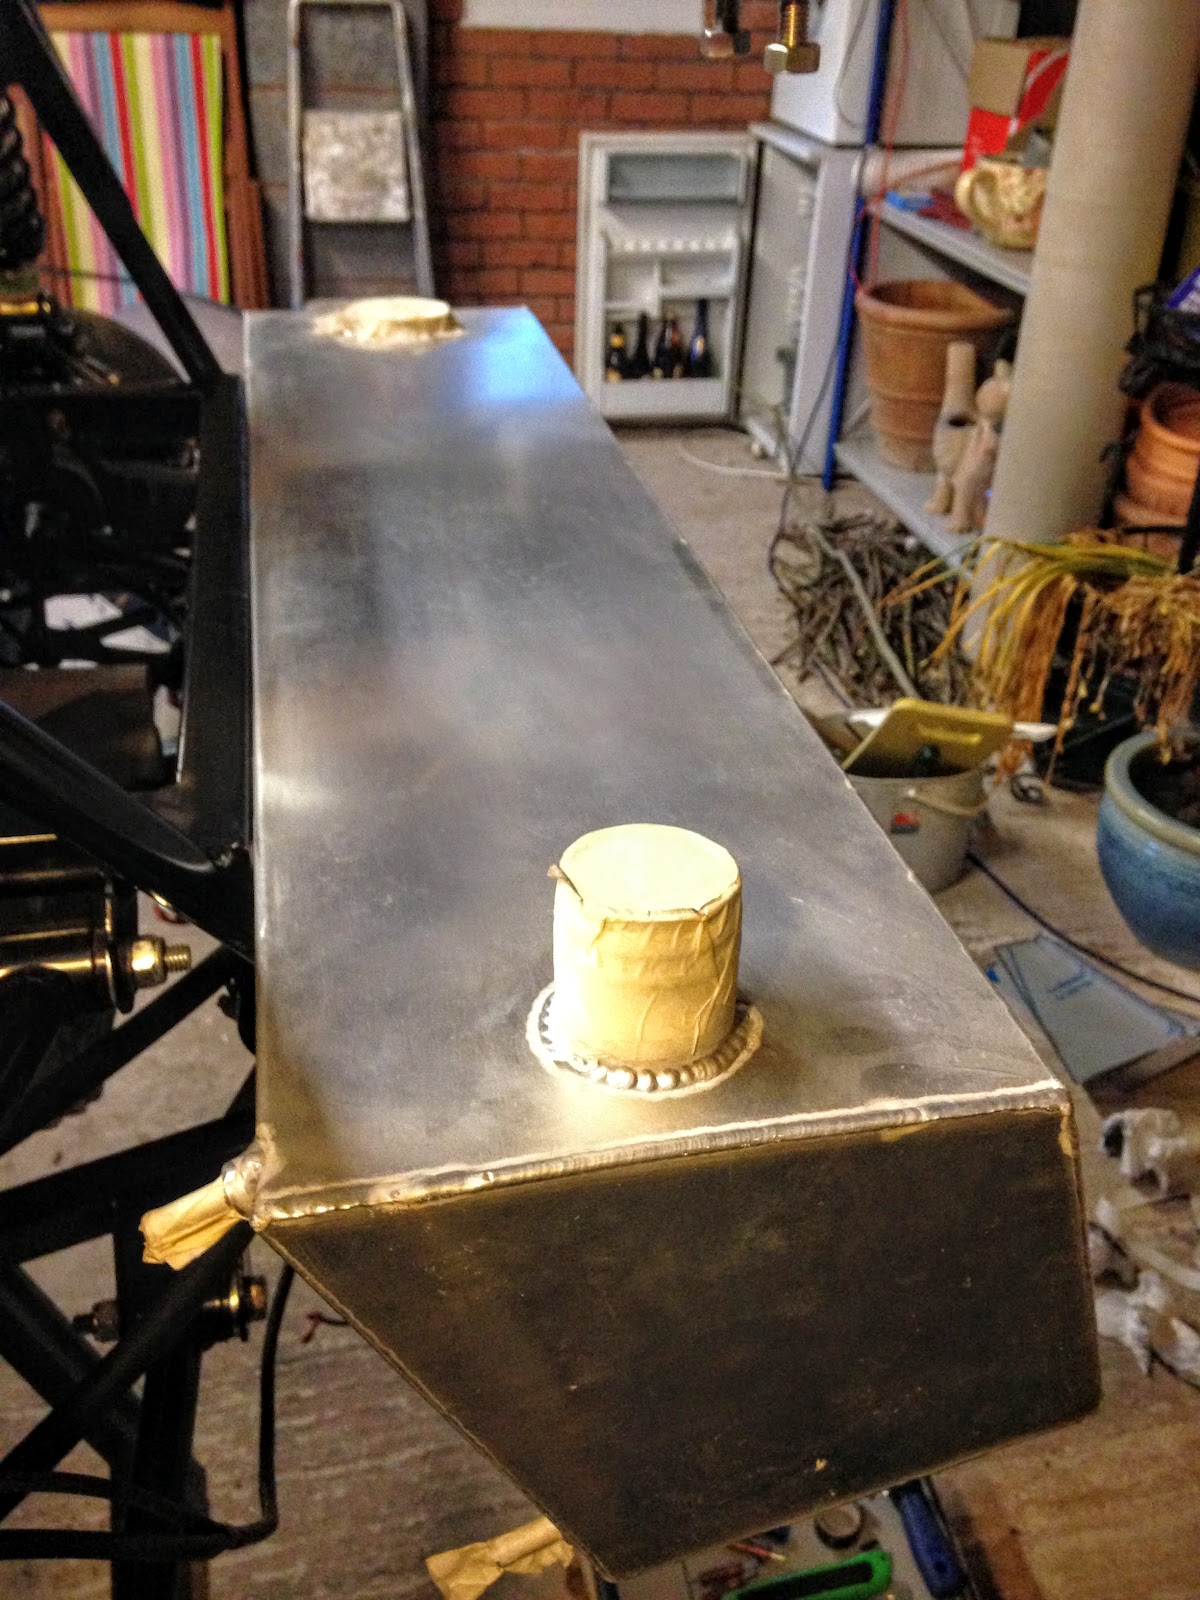
Fuel tank

Now I have got the rear panel into shape I have decided to focus more attention on the rear of the car and get it to a suitable point in the construction process where I can aim to get the rear panel fixed into position permanently.

that means getting parts such as the fuel tank, rear wiring, etc all fixed in.

Fuel tank - simple task - centralise along the rear of the chassis frame, sealant underneath, along the lower rear frame and along the top leading edge

Before I glued the tank into position I took the opportunity to see how the wiring loom will route around the rear of the panel, in particular the fog lamp, reversing light and number plate lamp - its quite tight these will need some gentle coercion into position when the rear panel is finally fixed into place.

The key thing I need to remember is to route the wires through the rear panel as I manoeuvre the rear panel into position rather than try to route wires after the panel is fixed in - my hands are too big to reach!

the following photos show the space where the fuel tank will sit and shows roughly how the rear wiring will route:


 A couple of photos of the tank glued into position.


 Once the tank had firmly fixed into position, I connected the fuel pipes to the upper and lower parts of the tank - fingers crossed the fuel system is connected up rear to front now with just the final routing to the engine to complete

Saturday, 23 April 2016

Fuel Filler Cap

Another nice quick job (like those sort of jobs!)

I purchased the ATR filler cap from GBS which is IVA compliant so at least I knew it would have no issue passing the test come the time I need to get it registered and on the road.

Although pricey for what is essentially a filler cap it is beautifully machined and comes with the fixings need to apply to the rear panel and two spare keys

The hole for the cap is already pre-drilled in the panel so its just simply a case of positioning in the panel, marking where the screw holes need to be made and carefully drilling those holes through the panel. 

The filler cap in turn has a gasket which needs to go on over the filler cap and then its simply a case of screwing the cap to the chassis.


Friday, 22 May 2015

Fuel lines part 1

Including under what I generically call "plumbing", now brake lines have been fixed into position next part of the plumbing is to run the fuel line down the transmission tunnel front to rear and connect to the Swirl Pot.

The fuel lines are simple enough to install and basically run alongside the brake lines fixed into position with cable ties. There is plenty of fuel line provided so balance out front to rear and fix into position either side of the P-clips holding the brake line to the chassis frame.

Where it does get tight is around the rear seat panel / differential / handbrake cable area where plastic protective conduit is needed to shield the pipes from the obvious movement of parts. 

When the drivers side transmission tunnel is fixed into position the conduit will be fixed to the panel via plastic saddle, cable tie riveted to the panel.

The front lines connect to the Swirl Pot whilst the rear plumbs into the fuel pump and fuel tank.