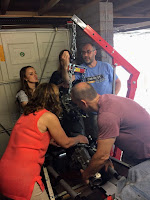
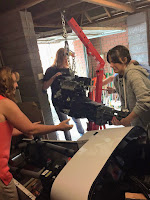
A good turn out of family to which I am eternally grateful to and I will give a shout out at the end of this post. Photos were provided by my Niece Jessica and I hope they encapsulate the team effort on the day.
Before the engine, gearbox was dropped in on the Saturday morning prior I had fixed the correct engine starter onto the bellhousing. All straight forward, three bolts hold it in although the bottom bolt near the sump can only be tightened when the engine is in position in the chassis and you can get underneath the car to access the bolt.
Although I had prepp'd the engine bay with padding earlier in the month, I took the opportunity to also remove the front radiator, steering column and move away loose wires on the wiring loom to avoid any potential damage.
Time to take a deep breath, stand back, go have a cup of tea, have a think, have a read and work out the approach to take in dropping the engine in.
So the approach I had mapped in my head was:
- Install from the drivers side
- Winch up the engine/gearbox
- Guide it round and over the engine bay (from the drivers side)
- Tilt it and drop it into the chassis,
- Push the draft shaft into the gear box and locate on the gearbox mount
- Fix on the engine mounts
- Centralise left and right on the centre line
- Drop down onto the engine mounts which sit on plates welding into the chassis.
Simple eh!
Before all that could be done, we had to re-locate the whole chassis further back into the garage which entailed lifting the rear with the engine hoist and using heavy labour on the front to shuffle the chassis back to enable better access to the engine bay.
I also elected to stand the front of the chassis on one axle stand centrally located to allow for better access by the engine hoist and it not to snag on two axle stands.
Once all that was done, time to apply the approach detailed above...
Too be honest, it worked as described, the challenges were:
- Guiding the engine up and over the chassis and controlling the drop on the hoist gently enough to not bash the chassis and drop the engine too rapidly - plenty of helpers to guide the engine over and judge the rate of drop
- Getting enough tilt and forward movement on the engine to point it down and under the scuttle, I cannot recommended enough that you invest in an engine tilt / loader leveler, this will help no end in getting the gearbox pointing down sufficiently, then use some muscle to push it under the scuttle into the transmission tunnel.

- Use a trolley jack underneath to support the gearbox at a level which allows for the driveshaft to push on cleanly and level. It is then a case of jiggling, pushing the engine, gearbox onto the driveshaft and locating the gearbox into the rubber mount whilst controlling the drop on the hoist. It was hard to see if the gearbox had located into the mount and too be honest it was more a case of feeling with fingers to establish it had located successfully.

- Once the engine/gearbox has successfully located onto the driveshaft and it is still supported by the hoist, fix on the engine mounts and tighten to the engine, then while judging the centre line / centre of pulley are lined up, drop the engine down on its mounts onto the the chassis plates.

Overall i would guestimate it took around an hour to complete start to finish. It went way better than I expected and feel this is huge milestone in the project finally getting the engine into the chassis
With grateful thanks to (in no particular order):
Sue, Alice, Neil, Vicki, Jess, Becky, Alex - what a team :-)


No comments:
Post a Comment