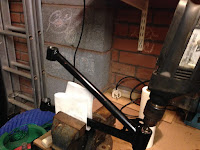
Process is extremely similar to what I explained in my earlier blog post on the pedals however to recap:
- Using a sanding drill bit clean out the powdercoat from the inside of the suspension
- File any weld protrusions evident inside the suspension arms where the bushes will be inserted
- Chamfer the plastic bush to assist inserting into the suspension arm
- Apply copper grease on the inside the suspension arm and the outside of the plastic bush
- using a vice squeeze the bush into the suspension arm being conscious not to damage the face of the plastic bush with the vice teeth.
6 down, 22 to go on the rear...a repetitive task!
Once these are done, the steel inserts can be put into the bushes again using some copper grease to ease it in with the help of the vice. You may need to clean out the insides of the plastic bushes before you insert the steel collar.
You also need to ensure the collar sits flush with the plastic bush face, if they protrude file or grind down to achieve the desired fit.
Not quite as repetitive... thankfully only 6 to do
 There are obvious left and right wishbones, standing at the rear of the chassis, the wishbones with a notch fix to the right hand side. You will also need to remove the flexible brake hose if already fitted to allow access for the bolts through the chassis and wishbones.
Penny washers need inserting between the plastic bushes and the chassis lugs through which the bolts pass through, smaller washers on the outside of the lug between bolt head and nyloc nut. All loosely fitted for now, however they will need torquing to 90nm before slackening off and tightening 15nm followed by a further quarter turn.


No comments:
Post a Comment