Sunday 15 February 2015

More Panelling

Back to some more panelling and I turned to the passenger footwell panel and decided to get that marked up, drilled, deburred and folded ready for fitting to the chassis.

the basics of the panel prep are covered elsewhere in the blog so I won't go over old ground suffice to say, some minor trimming is need to fit around weld points on the chassis frame but its now ready for centre punching the chassis and drilling the chassis before the black gunk comes out to fix into position and rivet (along with the drivers side footwell panel)


Fork End & Pin to Master Cylinder

I managed to grab a couple of hours in the garage Sunday afternoon following an overnight stay the previous day/night in Northamptonshire for a wedding. Not wanting to get too engrossed in anything complicated I turned to the fork end pin and considered that a quick job to tick off the list.

Basic process was to two fold:
  • drill a hole in one of the pedals to take the fork and pin
  • cut off and champher the bolt which goes into the brake master cylinder

So drilling first, I established an 8mm hole was needed for the pin so elected to drill to 8mm in steps, opening the hole in the pedal to 5mm, 7mm then finally 8mm.

Securing the the pedal into a vice, the drilling went well and I soon had a nice sized hole for the fork and pin to locate through.


turning to the bolt, I am conscious at this early stage I don't want to cut off too much as I don't yet know how the pedal will interact with the master cylinder and in turn how much travel will need to be applied to the brake pedal to apply the brakes! The fork does have an element of adjustment on the thread but better to be safe than sorry I chose to only remove approx 20mm of the bolt to start with - more can be done at a later date if need be.

Simple junior hacksaw to the bolt soon had that cut to size and I chamfered the end with help from the bench grinder and some emery paper.

A dry fit of the assembled fork, pin and bolt suggests as an initial start point it will be fine, the fork is screwed onto the bolt approx half way so I do have some further adjustment available. 

With this assembled I could finalise the positioning of the master cylinder relative to the bolt thus ensuring a smooth, even, level motion of the bolt into the master cylinder when the brake pedal is pressed. Once this datum had been established the master cylinder bolts were tightened up.

Job done! - a nice hours work and further progress.


Sunday 8 February 2015

Brake Master Cylinder


I took the opportunity to fit the brake master cylinder into position on the chassis. A simple task of two nut and bolt fixings. Not fully torqued up at this stage as I need to establish final position in relation to the brake pedal, fork pin and bolt which acts as the piston into the cylinder.

These all need to be lined up straight and true to optimise braking action.


Front tunnel panel

So, footwell panels in and ready for sealing watertight I moved onto the drivers side front tunnel panel, one of the few panels which actually needs a slight fold inwards.

Clearly the builder has the discretion to fit this panel either on the inside of the footwell or on the outside transmission tunnel side to provide some more space for feet which considering there is a clutch and brake pedal making it tight for the driver, locating on the outside is a no-brainer which thus creates the need for a fold to be made along the edge.
So same process as for footwell in terms of fitment to the chassis. Once all holes were drilled into the panel and deburred I offered it up to the frame and decided to evolve the chassis drilling part further from the method I adopted with the footwell panels. 

This time I marked up masking tape on the chassis frame, put a pen through the holes in the panel and marked the tape. Centre punched the pen marks, took a pilot drill and drilled through the pen marks and followed up with the 3.2mm drill bit. verdict...An improvement on the footwell drilling process but still not 100% happy however I feel this technique is better.

Next I looked at putting the fold into the edge of this panel to turn it in towards the inside of drivers cockpit. Relatively easy bit this, find some long wood, fix into vice along with the panel and ease the panel over the wood. A few test fits and further bends and the fold is in and the panel is ready for final fit once all the laser protective film is removed.


Footwell Panels final fix

The continuing cold weather makes evening opportunities to work on the car limited, so time and progress has been slightly hampered this past week, that aside I managed to get in to the garage and make further progress with the footwell panels.

One thing I have discovered in the fitment of the panels is you need a ready supply of 3.2mm drill bits! clearly I am still learning the knack for drilling the chassis but what I have established is:

  • You need a good centre punch to give the drill bit a chance to bite into the steel otherwise it will wander across the powdercoat, plus,
  • You need low revs on the drill, high revs and the drill bit will blunt making the job hard nigh on impossible

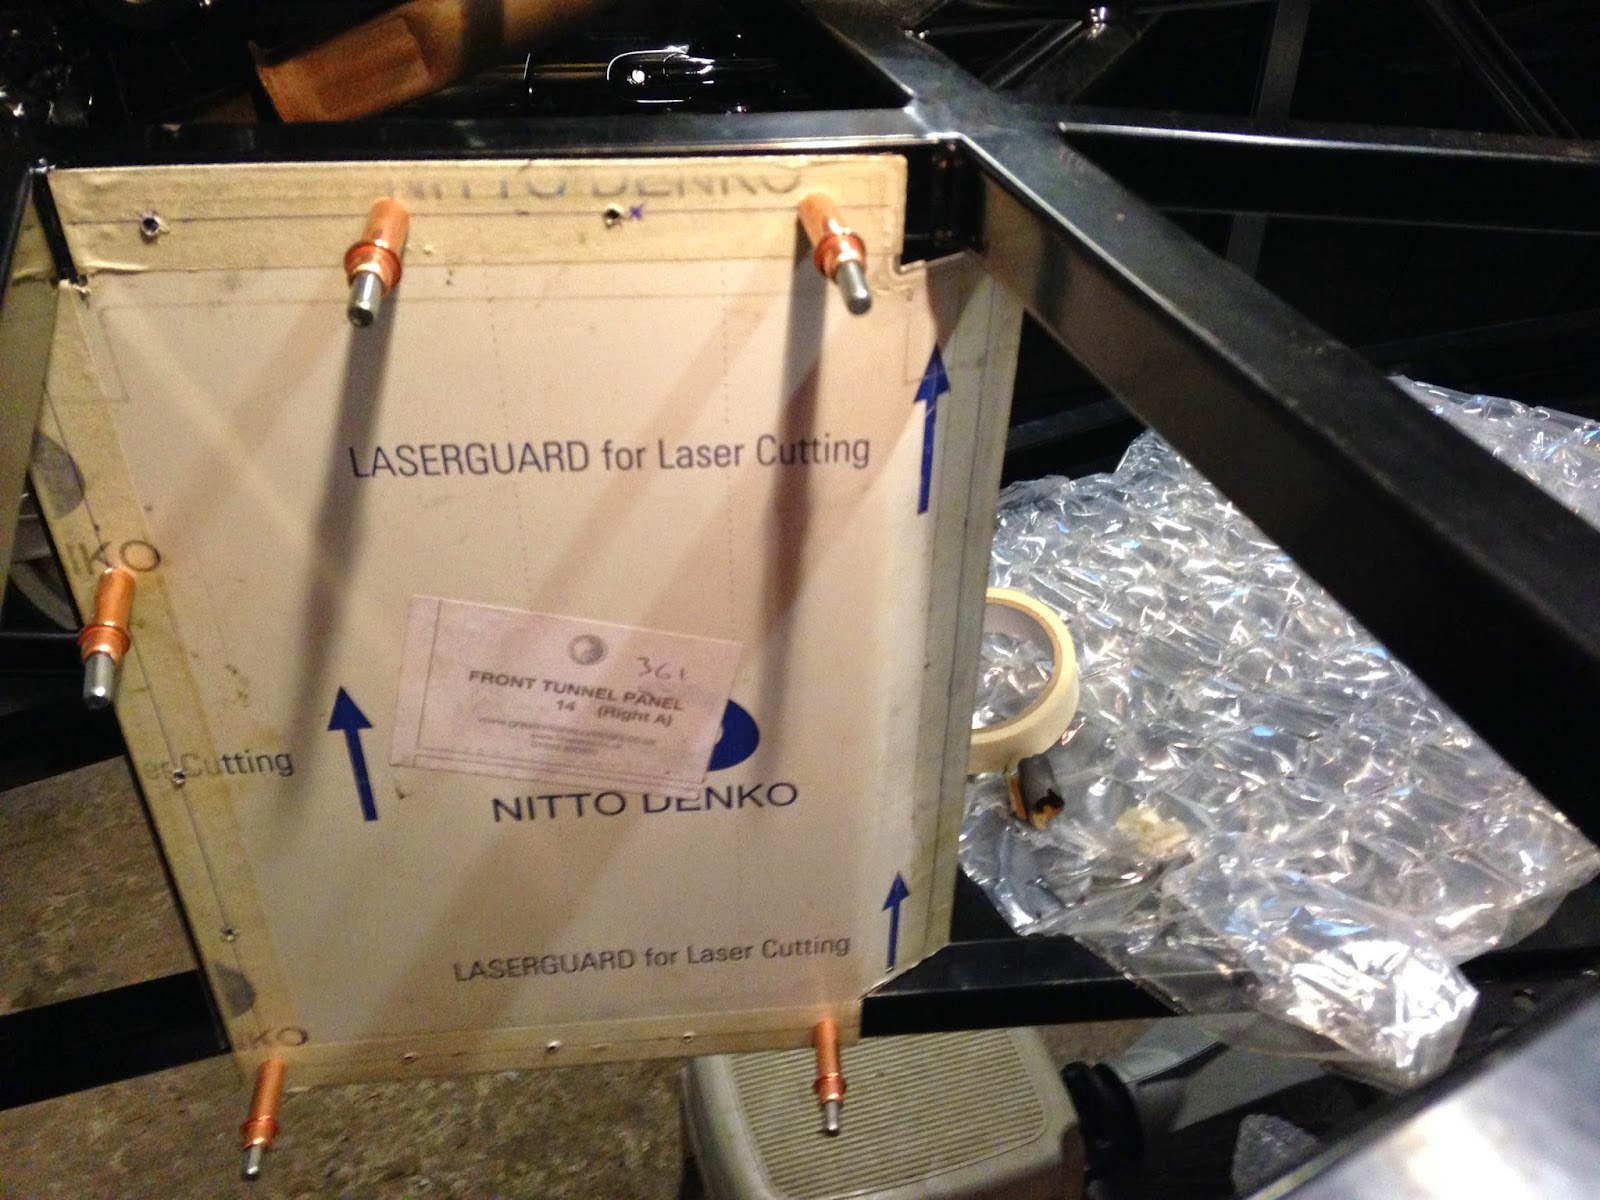
So with that thought process in mind, I managed to drill into the chassis frame using the panel initially as a guide to mark the holes in the frame which I then centre punched and followed up with steady low rev drilling. Cleco'd the panel as I progressed to ensure it all remained square and true in the chassis.

Once drilled, everything was cleaned with white spirit, the laser protective film removed and time to crack open the black polyurethane sealant


The sealant.... you need disposable gloves without question, get it on your hands and if not removed immediately with white spirit it will stain your skin and however much scrubbing you do after it will remain ingrained for days after. The sealant is also extremely sticky, it grabs the steel virtually immediately but you do have some time to maneuvere into final position.


I elected to run a thick bead down the middle of each side over the drilled holes in the chassis. Inserted the rivet and gunned the rivet in cleaning excess sealant up with a white spirit soaked cloth.

I need to follow up with sealing the inside of the footwells once it they have fully dried to make it all water tight.